Replacing or installing aluminum windows enhances the beauty and design of your home and ensures energy efficiency and security. Regardless of how often you are replacing old windows or installing new ones, it can be as simple as it sounds if you take it step by step. In this article, we will provide a sequence involving each stage of installing the windows, from preparing to the last details.
Tools and Materials Needed:
- Aluminum Window frame
- Tape Measure
- Level
- Drilling Machine
- Screw Driver
- Screws
- Shims
- Sealant or caulk
- Saw (if frame requires slicing)
- Safety gloves and goggles
Step 1: Measure the Window Opening
Like all other DIY projects, the very first step is to measure the window frame opening from time to time. Step one involves measuring both the width and height of the window through and through (width tracing from the top center to the left bottom to right, and height tracing from right center to left bottom center middle, and top). Ensure to take off at least 10-15mm off the measurements; this is to allow the use of shims.
Tip: Always use a level during measurement to ensure the opening is square.
Step 2: Clean the Surface of the Window Frame
If it is required, modify the dimensions of the aluminum window frame by cutting it with a saw. Cutting aluminium is quite easy however, remember the saying measure twice cut once. Remove any dust, dirt, or debris on the frame because it will interfere with the installation.
Step 3: Applying Sealant to the Frame
Measure the edges of the window opening and apply plaster underneath the window in the opening before the window frames are set to close. This border will concrete itself once the frame is inserted and there will be no chance of water or air creaking up. Make sure not to pour too much or it adds ammunition to the sliding of the frame while putting it in.
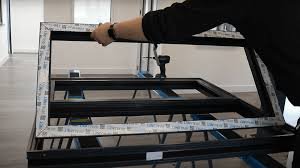
Step 4: Putting in the Aluminium Window Frame
Taking care of the edges, insert the frame with the cut sides inside the holes. Adjust the aluminum window design to the elevation you want and try to keep it straight. Level it from all sides using a spirit level, and adjust it until you get the desired angle. It might even be necessary to get someone to help you secure it while you insert, twist and screw things into place.
Step 5: Fix the Frame with Screws
After it has been confirmed that the window frame is level, proceed to fasten it to the wall—also, start by drilling holes into the window so that the frame can be bolted into exposed wall studs or sills. Bolts are then tightly secured, however, undue pressure must not be used as this could damage the frame so make sure to securely space them around the perimeter of the frame.
Tip: Make sure to use shims if the frame of the window requires fine-tuning as these will allow you to keep the frame steady.
Step 6: Attach the Window Sashes
Finally, fix the movable components of the window in their position, which is done after fixing the frame into position – aluminum window sashes are usually used to achieve this. The type of window you have will determine the subsequent steps; If your window is the sliding form, then first the top sash should be inserted and then the lower sash—this allows for easy gliding inside their tracks. If yours is a casement or hinged window, then follow the instructions provided by the manufacturer on how the window sashes should be attached to the window frame.
Xuzhou Jinlong Construction and Development Co, Ltd New Case
Step Seven: Sealing Everything as per the Window Code
Seal the opening after affixing the window sashes to stop any lateral draughts. Do it again, applying a thin strip of caulk along the outer edges of the window. Make sure there aren’t any big gaps between the walls and the window frame by smearing caulk onto the frame that touches the wall. This step is important later on for getting good energy efficiency since it stops any potential heat loss and air being leaked out.
Step Eight: Insert any Repairs done back inside the Window Frame
Try the window before you leave, make sure it can be locked as well. Also notice it, the window in the frame to be closed tightly and to fit into its place without odd gaps in between. If it is done then it has to be anticipated the window projects upwards and with a thumb then remove the small adjustments needed to lock it down into place.
You can get help from Aluminium and Metals.
Conclusion
Aluminum windows are among the most creative and exquisite enhancements for the house. A fair smooth finish, as well as the right tools, enabling provisions along with adequate windows installation procedures, makes the job considerably easy. You will be shocked to learn that by owning an aluminum window, you won’t be able to fit any natural skyline as the window is slim which only means that your vision will remain intact. Measurements, leveling, and sealing are key steps to window installation so make sure to get this straight.